A common scenario we see with our clients is the need to replace Excel-based forms that are inherently difficult to manage, with a SharePoint solution that will provide a much more robust solution.
In this post I will walk you through a step-by-step process for using InfoPath Designer to import your Excel forms into SharePoint, thus enabling your organization to take full advantage of all the benefits InfoPath provides for form-driven data acquisition.
Pre-Requisites
In order to implement the steps outlined below you will need to have SharePoint 2010 Enterprise and Microsoft Office Professional Plus (which includes InfoPath Designer).
This exercise also assumes that you have working knowledge of InfoPath Forms in SharePoint and have some experience designing, creating appropriate connections and publishing Forms to SharePoint.
Step 1
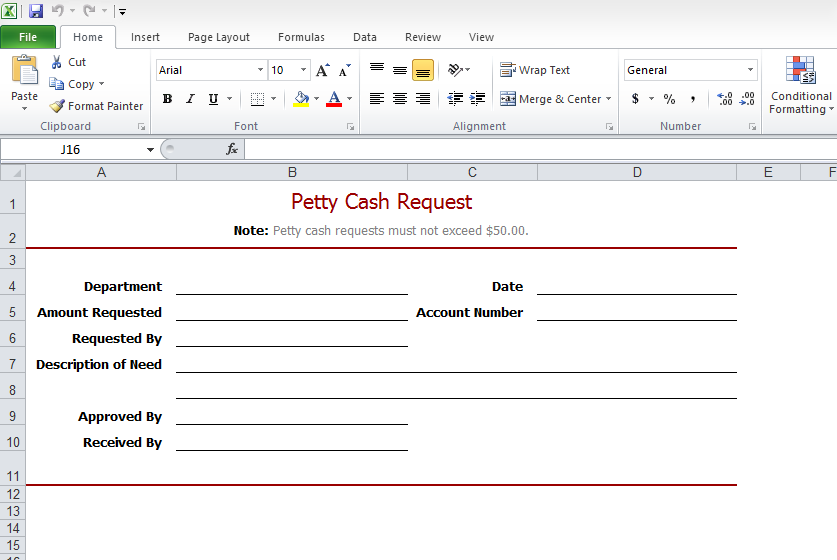
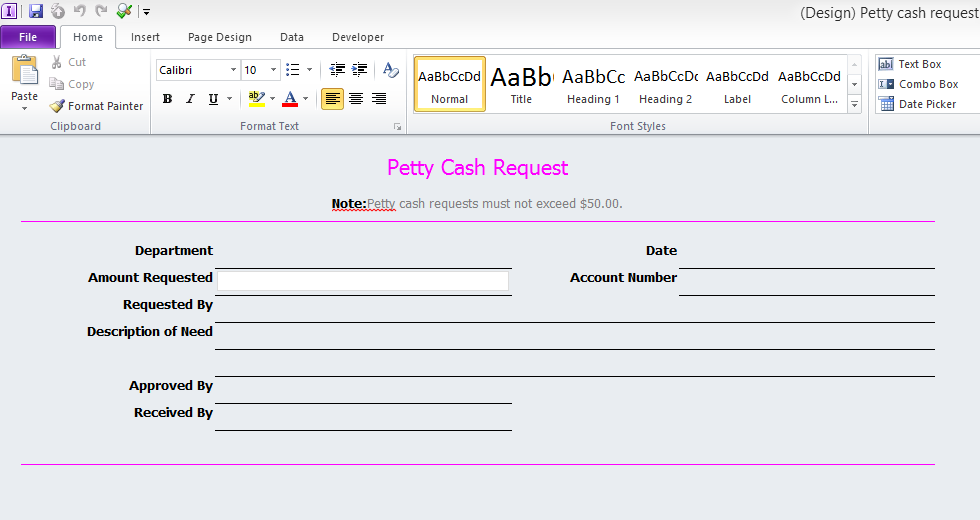
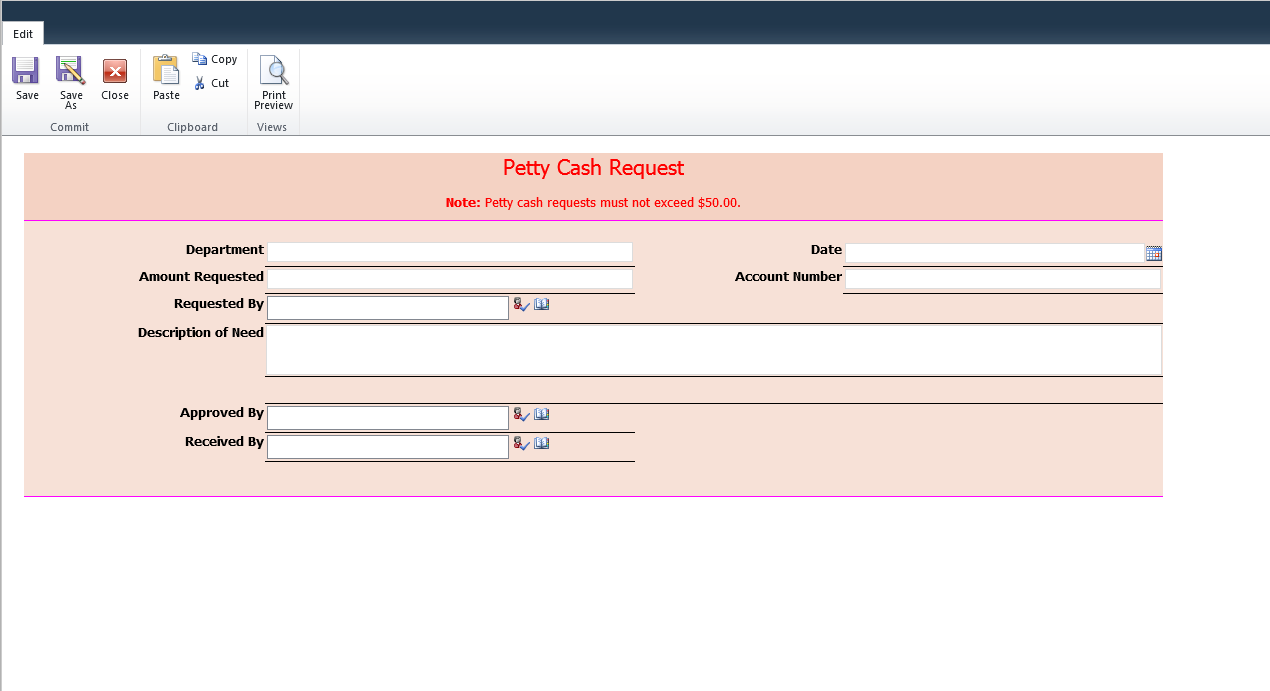
Take an existing Excel form. For our test case, we are going to use a form titled Petty Cash Request. The purpose of the form is to allow a user to request Cash from the company and track these requests and approvals.
Step 2
Launch InfoPath Designer 2010.

Step 3
Once InfoPath Designer is open, from Advanced Form Templates, double click on “Convert Existing Form.”
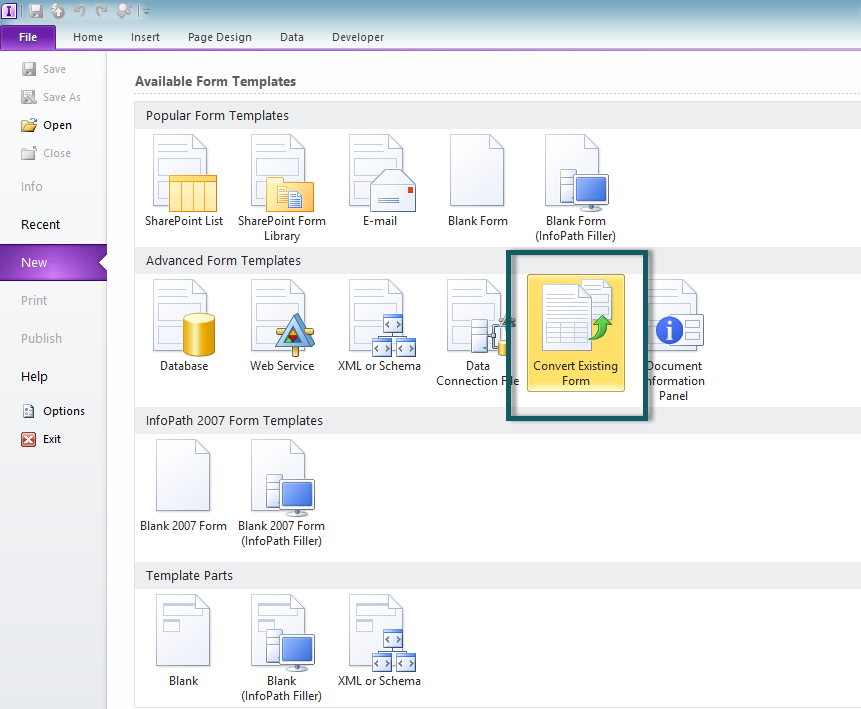
This will launch the Import Wizard.
Step 4
Select the appropriate method depending on the format of the form you wish to import. For our test case, we will choose “InfoPath importer for Excel workbooks”.

Step 5
Browse to the form you wish to import.
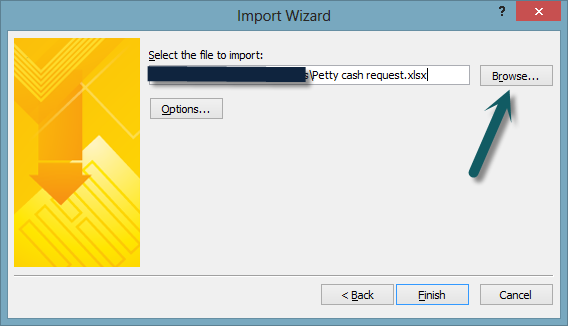
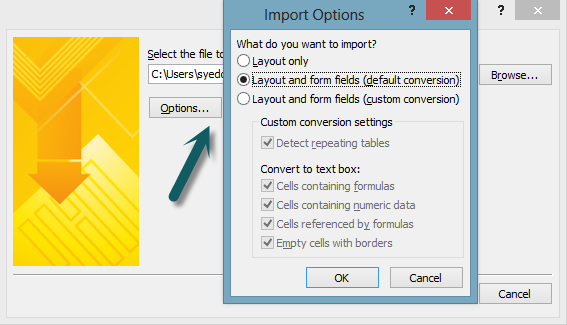
You have the additional options to refine your imports and limit the conversion measures of the import.
Step 6
Finish the Import Wizard.

It will process the import and show that “The form template was imported successfully”.
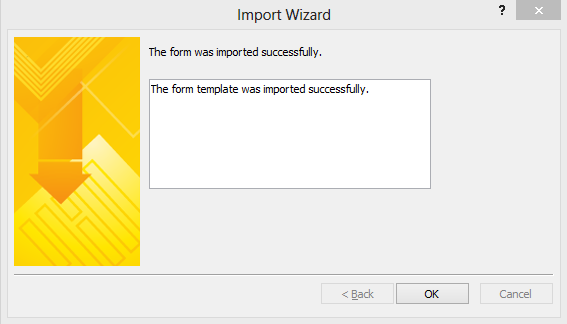
After you click ok, you will see your Excel Form open in InfoPath Designer.
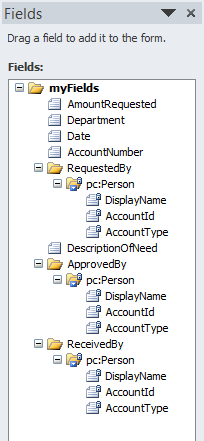
On the right hand corner, you will see the list of Fields imported that are associated with this form.


Step 7
Enhance the look and feel of the form using the Formatting tools available.
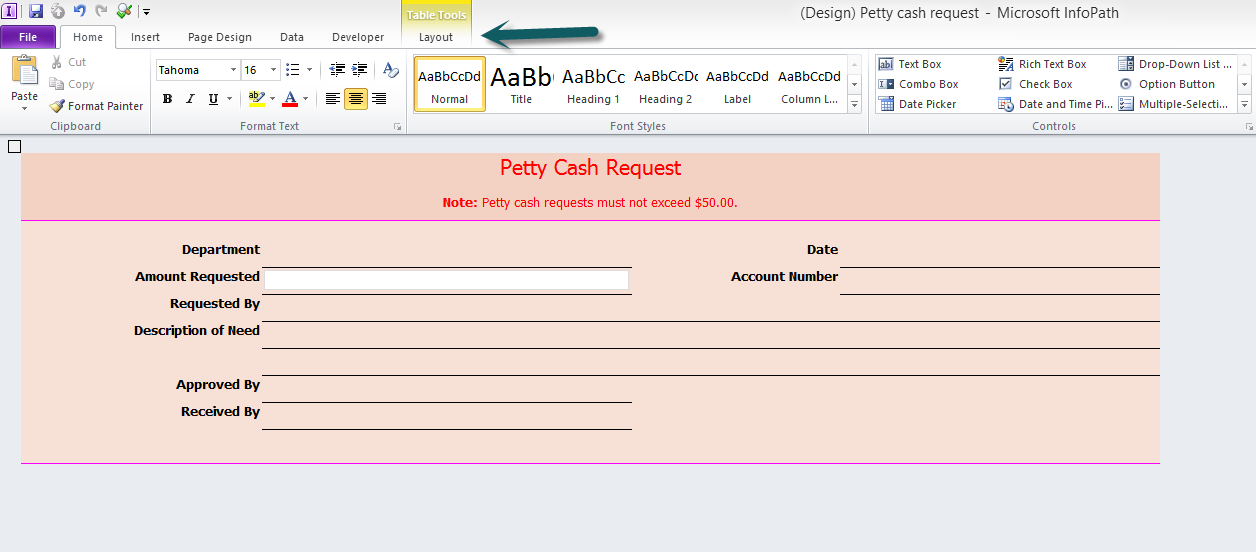
Step 8
Using the Controls section, create the appropriate fields for the rest of the entities.

You can take advantage of the Date Picker and People Picker controls for the test case to create an effective form.

You can also add more sections and fields to the form if you wish to enhance the capability and information accrued.
Step 9
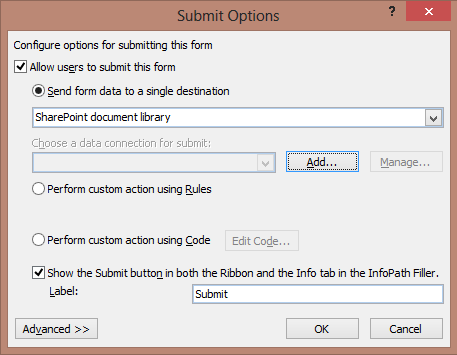
Once you have refined the form and created appropriate fields, Create a Submit Connection to the appropriate destination.
Step 10
Publish the form to the appropriate Form Library or Content Type within your server site and allow your users to fill out the form via the Browser.
InfoPath Designer can readily import forms with more complex structure and architecture. The capabilities should enable you to migrate all of your Excel forms and take advantage of centralized management capabilities that enable users to fill, and store forms associated with various business processes. This will eliminate the chaos of Excel hell that is a common point of pain.